This Article will explain how I installed a dual battery system in my boat (Gheenoe Super 16). What is a dual battery system and why should I install it?
Why Consider a Dual Battery System?
Installing a dual battery system on your boat is a wise decision that can enhance your on-water experience significantly. Many boaters face challenges with their electrical systems, especially when it comes to battery life. A dual battery setup addresses these challenges, ensuring you have enough power for all your equipment and extending your overall battery lifespan.
Enhanced Reliability and Convenience
With a dual battery system, you can rely on a dedicated starting battery and a separate house battery. This segregation ensures that the house battery is reserved for powering accessories, such as lights, radios, and other electronics, without risking the depletion of the starting battery. In scenarios where electronic equipment demands more power, you won’t find yourself stranded with a dead battery.
Improved Power Management
Another compelling reason to install a dual battery system is the enhanced power management it offers. You can choose to run either battery for different operations, allowing for efficient use of energy resources. This capability is especially helpful during longer trips, where you can easily switch to the backup battery to maintain essential functions. By optimizing how you utilize battery power, you can enjoy more extended outings on the water without worrying about running out of juice.
What do you need?
- Add-A-Battery Kit (Amazon)
- Wires
- Butt connectors and Terminal Mounts (Amazon)
- Appropriate Gauge Wire and Length (I used these from Amazon: 4 AWG Wire & 10 AWG Wire)
- Fuse Holder for the 1A Ground (Amazon)
- Negative Bus Bar (Amazon)
- Appropriate Amp (depends on engine alternator output) Circuit Breakers (Amazon)
- Heat Gun (Amazon)
- Wire Cutting and Crimping Tool (Amazon)
- Hole Saw (optional)
- Drill
- Other generic tools
Determining your wiring and placement
The following picture is an example wiring diagram I used for my boat. Note that the gauges of the wire on the diagram versus what was actually used is not completely accurate.
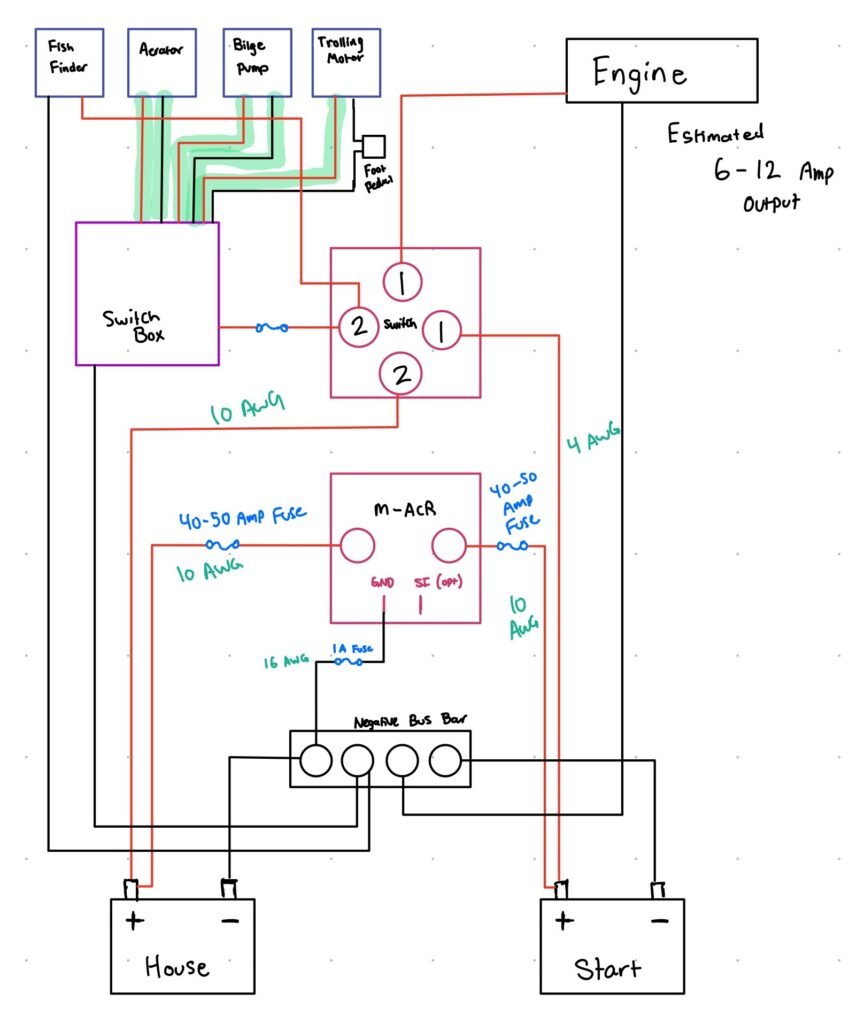
I highly recommend making your own diagram so you can accurately and methodically plan how you are going to install this system without accidentally making a mistake and burning some wires or frying some equipment.
Installing
The follow steps are to install the dual battery system on your boat.
Disconnect all electrical connections
First you will want to disconnect your current battery. To do this disconnect the negative ground wire (black) from the battery then disconnect the positive wire (red) from the battery in that order. Do this for everything connected to the battery.
Wiring
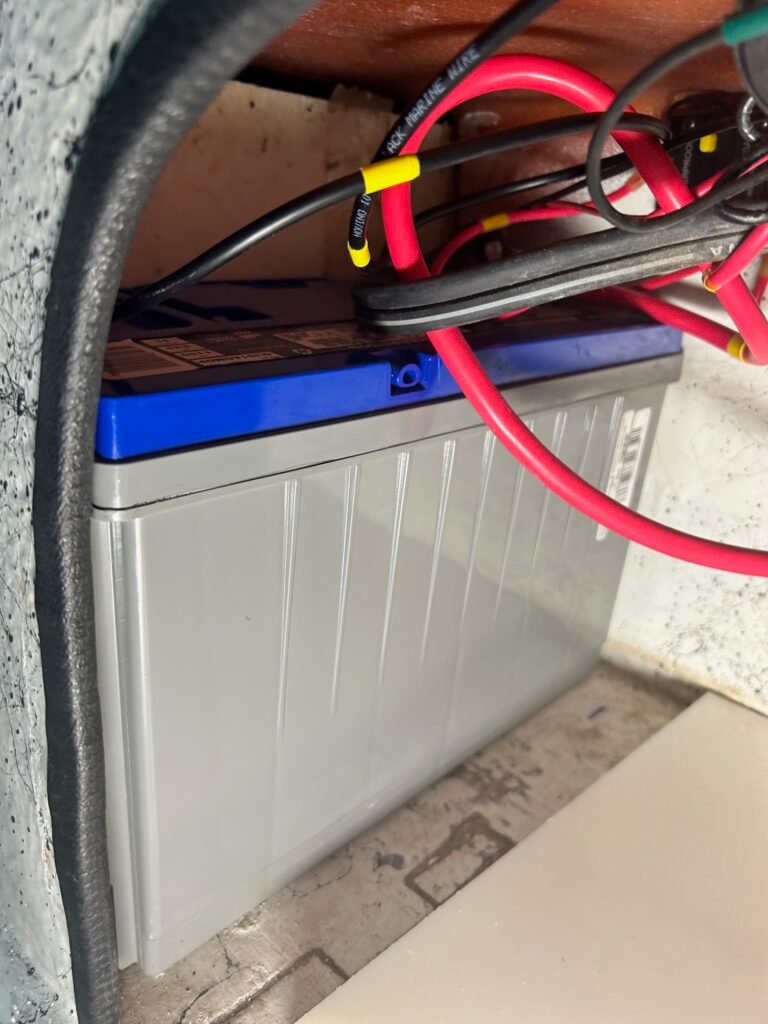
Next you will measure out and cut the length wires you will need. Strip each of the wires and attach butt connectors or terminal mounts to the end of each side depending on where/what the wire will be connecting to. You will want to use waterproof connectors that have heat shrink tubing with a waterproof adhesive on the inside already applied. This will ensure that they will be watertight. The next step is to crimp the connectors and use a heat gun to shrink the shrink wrap on the connectors.
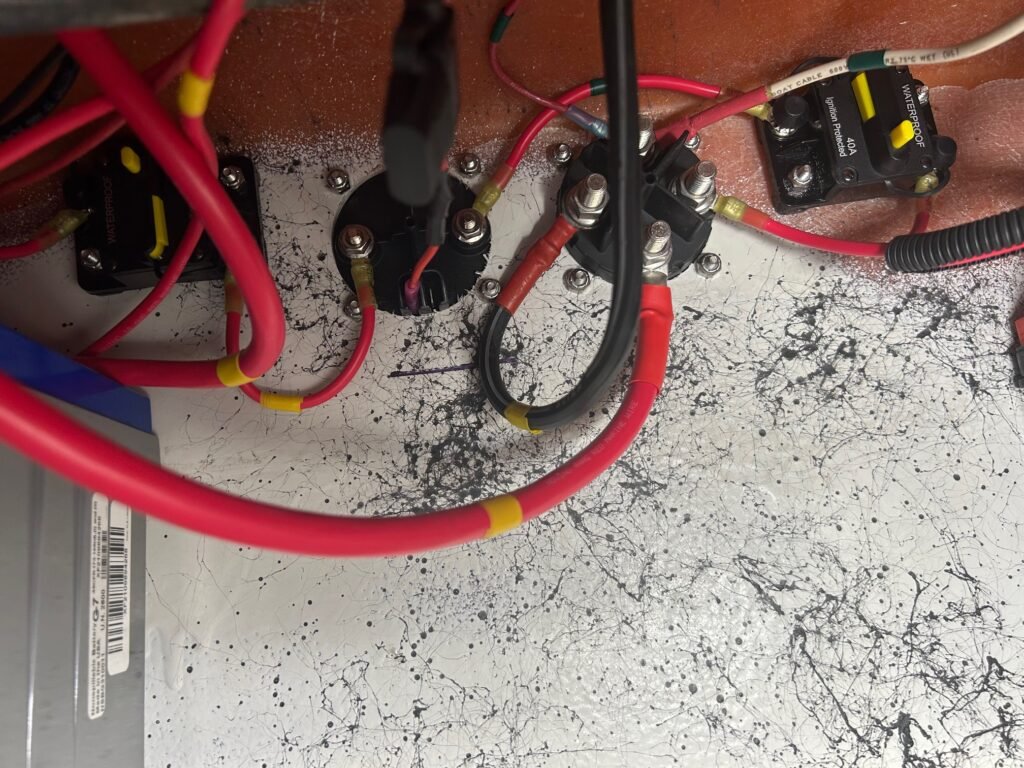
I suggest marking each wire with colored electrical tape to distinguish if the wire is part of the house battery or engine battery circuit. As shown in the following pictures: I marked engine battery wirers with yellow electrical tape and house battery wires with green electrical tape.
Connect everything together and test it out
Before doing anything to the boat, I setup the entire circuit by just laying it out on the floor of the boat and connecting everything. I did this one battery at a time. Start by connecting the house battery to the circuit and testing all of the electronics connected to the house battery. Do the same thing for the engine battery and start the engine. Next do both batteries at the same time and ensured all electrical functionality is working properly. This step ensures that all of the wires and connections you created work properly. If something is not working as you thought, it’s much easier to replace the wire before having it installed onto the boat where it may prove difficult depending on the location.
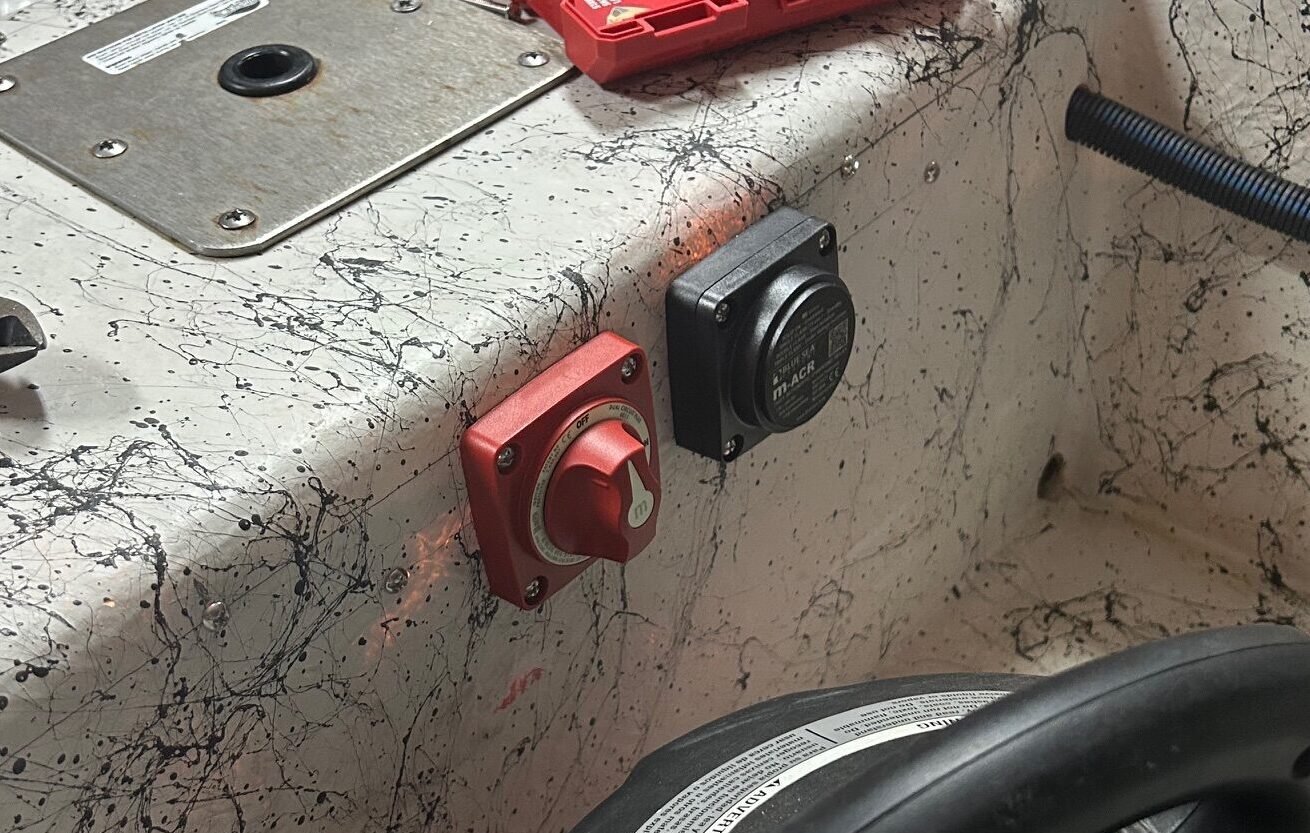
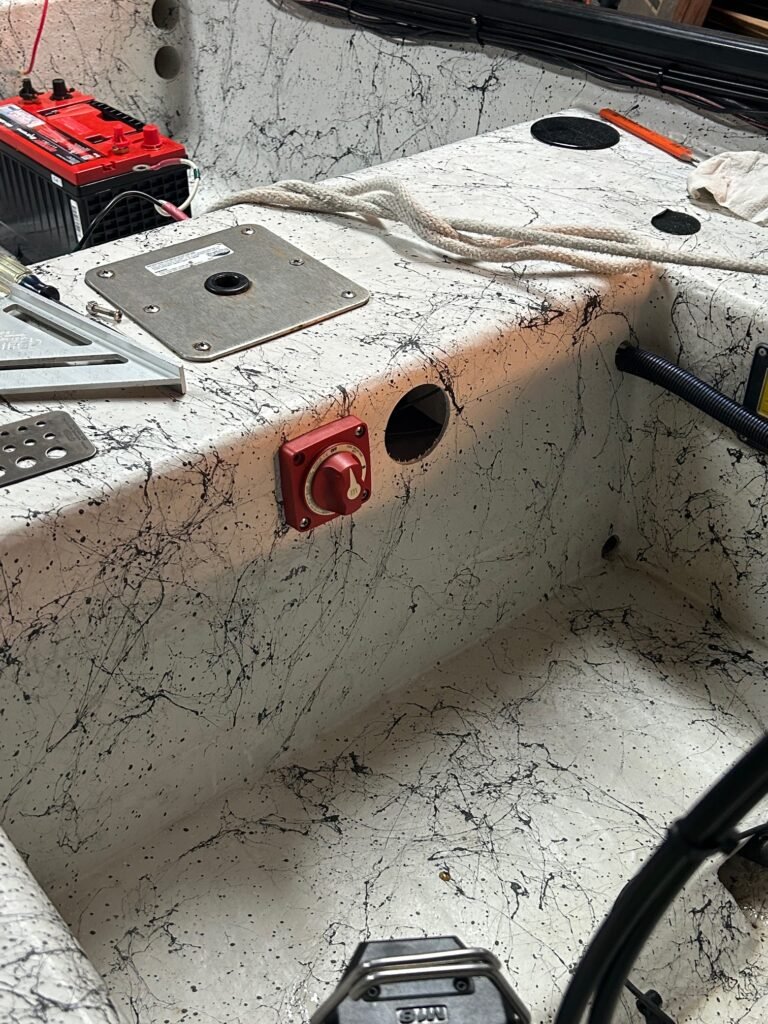
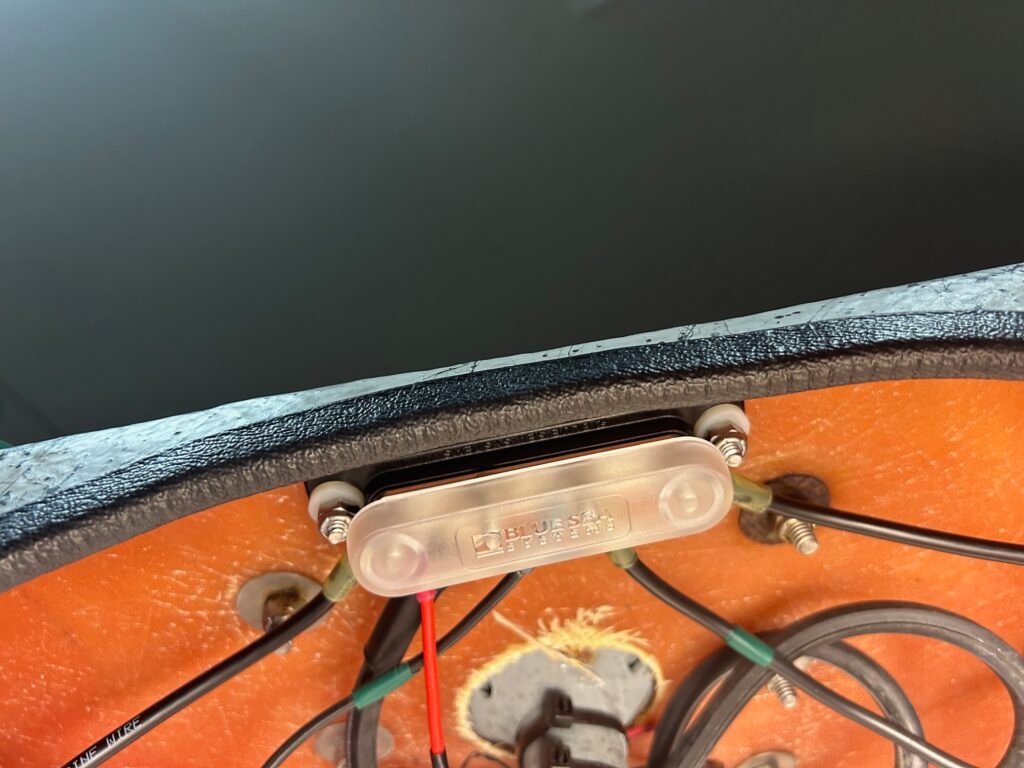
Mount the Switch and (m)ACR
This step depends on where you decided to mount your electronics. There are three options: mount electronics to marine wood and mount the marine wood inside the boat, mount the electronics directly to the boat, or do the same as step two but for the Switch and ACR you drill holes and mount through the hull somewhere on the inside of your boat. I chose option 3. To do option 3 we used a hole saw to drill the appropriately sized hole for the units, the hole size is documented in the Blue Sea Systems documentation that comes with the Add-A-Battery Kit.
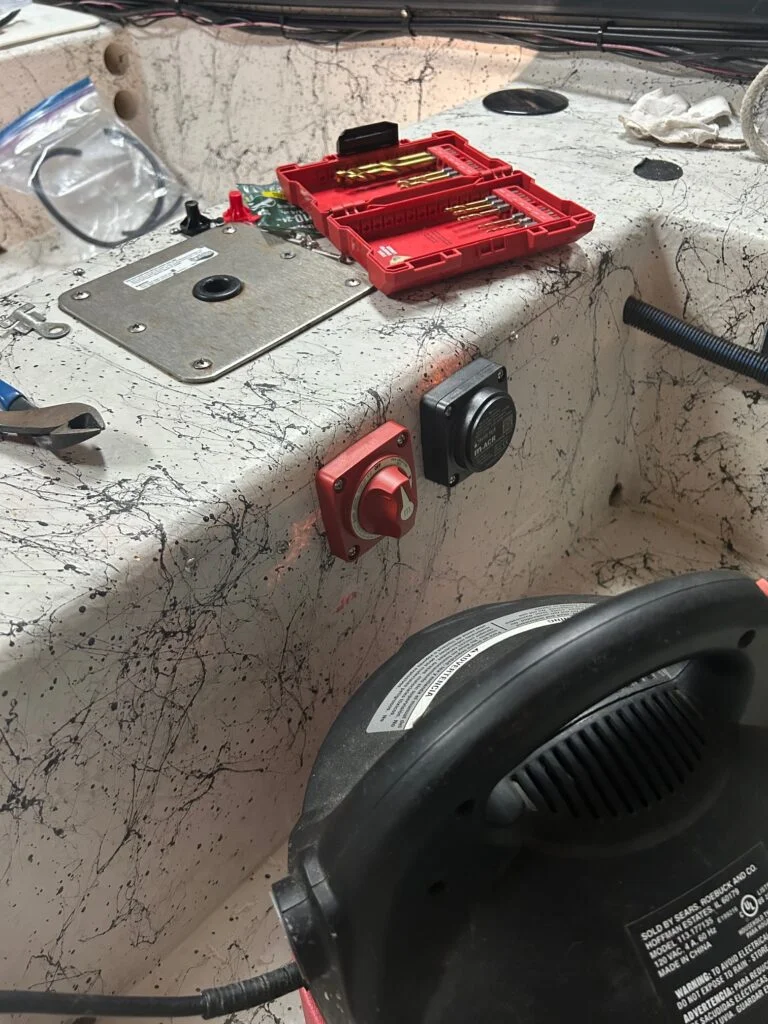
mount dual battery electronics and wiring
At this point you will want to mount everything and route all your wiring, some of this was partially covered in the last section. When mounting be sure to use stainless steel parts for everything.
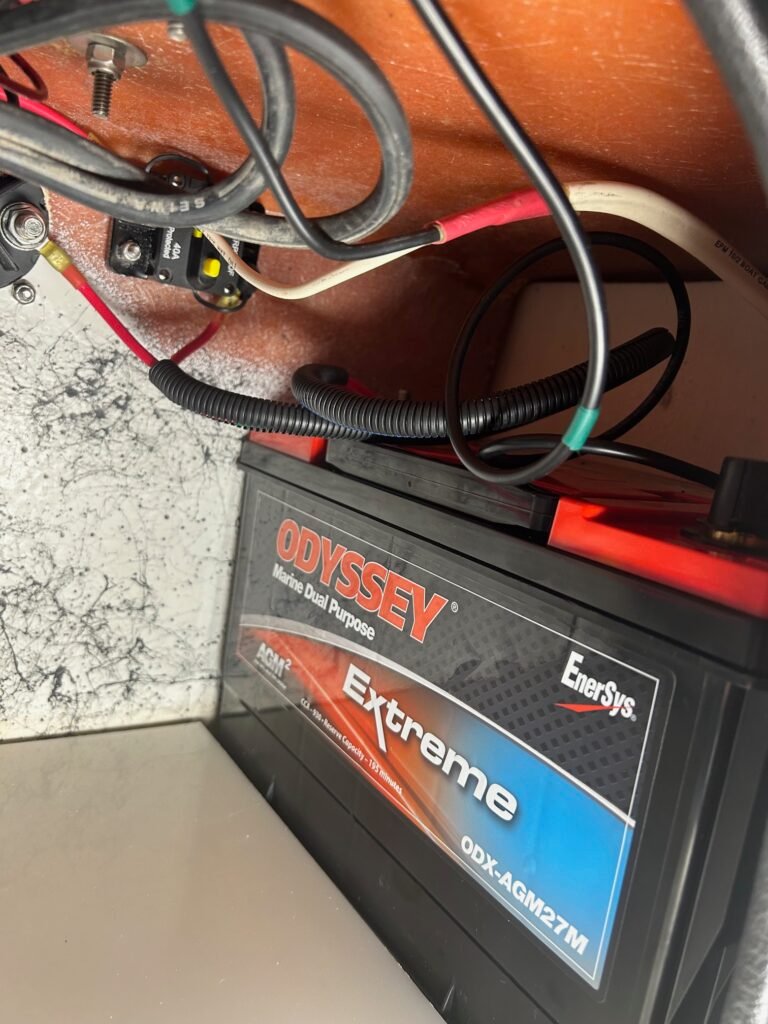
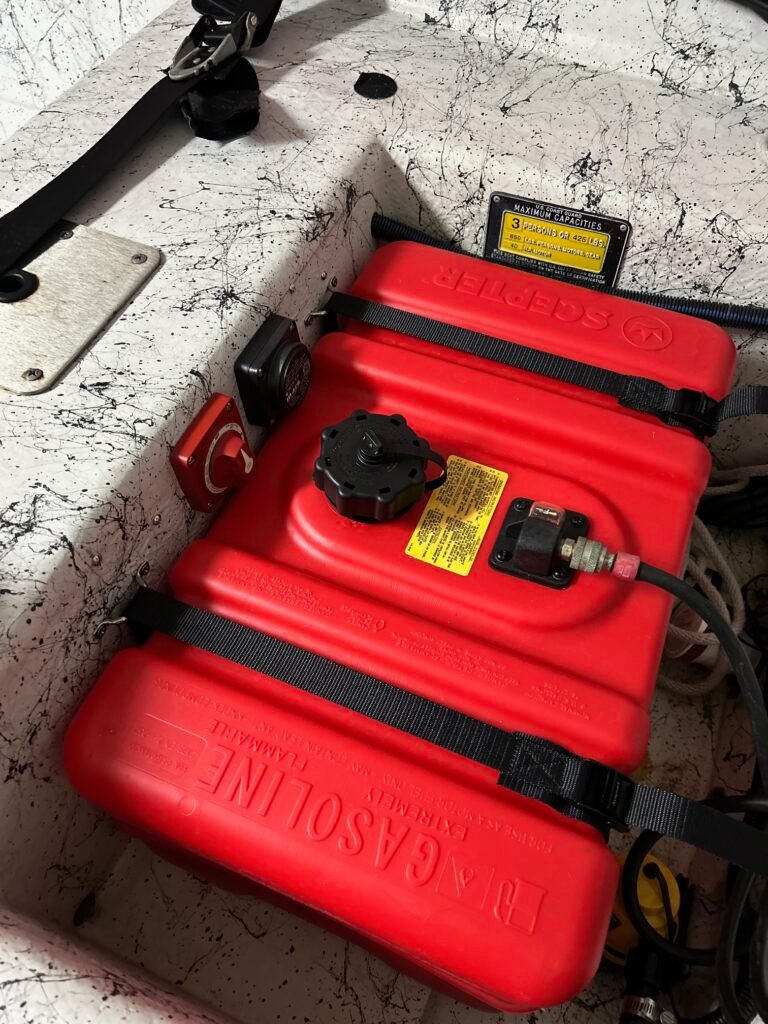
Connect the batteries
Finally secure your batteries in your boat and connect the Switch and ACR to your batteries.
Testing it out
Now all that’s left to do is test it out. To test turn the switch to the on position.
House Battery:
To test the house battery, test all the electronics on your boat connected to the house battery and ensure each of them is working correctly.
Engine Battery:
To test the engine battery, start your engine as you would if you were flushing it. Start the engine and let it run. Check the status light on the ACR or m-ACR and ensure that the light a solid green to show that the unit is active and working properly.
Conclusion
And that’s it you’re done! You have successfully finished your dual battery boat installation!
If you want a video version of the content presented in this article is can be found here: